

KUSANAGIでWordPressサイトを立ち上げる方法
VPSインスタンスのIPアドレスが133.130.96.85だとして話を進めていきます。
$ ssh root@133.130.96.85
The authenticity of host '133.130.96.85 (133.130.96.85)' can't be established.
ECDSA key fingerprint is SHA256:O+KB7WYxy0VUw1ABqt/OXftnBnOCdHtr7MAGm7BiHkU.
Are you sure you want to continue connecting (yes/no)? yes
Warning: Permanently added '133.130.96.85' (ECDSA) to the list of known hosts.
root@133.130.96.85's password:
VPSインスタンスを立ち上げた時に設定したパスワードを入力しログインできればOK
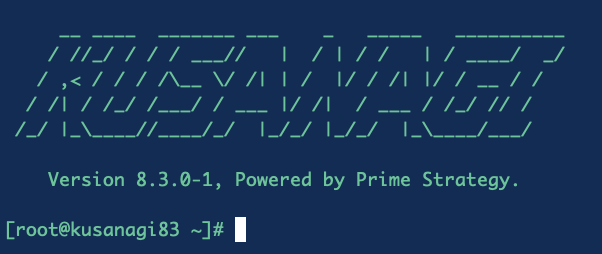
このようにターミナルに表示されればOK
↓VPSインスタンスのセキリュティの設定はこちらを参考にしてください。
KUSANAGIの初期設定
WordPressサイトを立ち上げる前に、KUSANAGIの初期設定が必要です。
VPSインスタンスのLinux OSであるCentOSをyumでアップデートします。
yum --enablerepo=remi,remi-php56 update -y
アップデートされるのに数分間かかります。
reboot
rebootしてVPSインスタンスを再起動します。
再起動後は自動でログアウトされるので、
ssh root@133.130.96.85で再ログインします。
kusanagi init
kusanagi initを行うとGenerating DH parameters, 2048 bit long safe prime, generator 2
Asia/Singapore
Asia/Srednekolymsk
Asia/Taipei
Asia/Tashkent
Asia/Tbilisi
Asia/Tehran
Asia/Thimphu
Asia/Tokyo
Asia/Tomsk
Asia/Ulaanbaatar
Asia/Urumqi
Asia/Ust-Nera
Asia/Vientiane
Asia/Vladivostok
Asia/Yakutsk
Asia/Yangon
Asia/Yekaterinburg
Asia/Yerevan
Atlantic/Azores
Atlantic/Bermuda
Atlantic/Canary
Atlantic/Cape_Verde
Atlantic/Faroe
Enter
Applying Location: Asia/Tokyo.
Select your using language.
1 : English
2 : 日本語
q : quit
Which are you using?: 2
You choose: Japanese
Select your keyboard layout.
1 : English
2 : Japanese
q : quit
2
You choose: Japanese
kusanagi user password using in software update.
Changing password for user kusanagi.
New password: 【kusanagiユーザーのパスワードを決めて入力します】
Retype new password:【確認のためもう一度】
passwd: all authentication tokens updated successfully.
Generating public/private rsa key pair.
Enter passphrase (empty for no passphrase):
*パスフレーズを入力せずにエンターしてOKです。
Enter same passphrase again:
Your identification has been saved in /root/kusanagi.pem.
Your public key has been saved in /root/kusanagi.pem.pub.
The key fingerprint is:
SHA256:lNwBWm0mt0zDNtoU/vgZmtdGLBR6XRXxSz08Mv3sw0I root@kusanagi83
The key's randomart image is:
+---[RSA 2048]----+
| o+o.. o*|
| +.+%o oo.o|
| . +%++oo.*o|
| .. += .+.=|
| S . +Eo.o|
| +.*.. |
| o +.oo.|
| . .. .|
| |
+----[SHA256]-----+
KUSANAGI can choose middlewares.
Please tell me your web server option.
1) NGINX(Default)
2) Apache
Which you using?(1):1
You choose: NGINX
use nginx
Done.
Then, Please tell me your application server option.
1) PHP7(Default)
2) HHVM
3) PHP5
Which you using?(1):1
You choose: PHP7
use php7
Removed symlink /etc/systemd/system/multi-user.target.wants/hhvm.service.
Created symlink from /etc/systemd/system/multi-user.target.wants/php7-fpm.service to /usr/lib/systemd/system/php7-fpm.service.
NOTICE: Please run the following command to change the php command path in the current shell.
$ hash -r
Done.
All settings correct for using Composer
Downloading...
Then, Please tell me your ruby version.
1) Ruby2.4
Which you using?(1):
You choose: Ruby2.4
use ruby24
Then, Please tell me your Database system.
1) MariaDB(Default)
2) PostgreSQL
Which you using?(1):1
You choose: MariaDB
Restarted the MariaDB.
Enter MySQL root password. Use [a-zA-Z0-9.!#%+_-] 8 characters minimum.
Re-type MySQL root password.
Password has changed.
Change MySQL root password.
MariaDB is already upgraded.
Removed symlink /etc/systemd/system/multi-user.target.wants/mariadb.service.
Removed symlink /etc/systemd/system/mysql.service.
Removed symlink /etc/systemd/system/mysqld.service.
innodb_buffer_pool_size = 384M
query_cache_size = 128M
Created symlink from /etc/systemd/system/mysql.service to /usr/lib/systemd/system/mariadb.service.
Created symlink from /etc/systemd/system/mysqld.service to /usr/lib/systemd/system/mariadb.service.
Created symlink from /etc/systemd/system/multi-user.target.wants/mariadb.service to /usr/lib/systemd/system/mariadb.service.
Restarted the MariaDB.
use php7
monit is already on. Nothing to do.
KUSANAGI initialization completed
Done.
| タイムゾーン | Asia/Tokyo |
| 言語 | 日本語 |
| キーボード配列 | Japanese |
| kusanagiアカウントのパスワード | 任意のパスワード |
| kusanagiアカウントのrsa 鍵ペアに対するパスフレーズ | 何も入力しないでエンター |
| WebサーバーにNGINXを使うかApacheを使うか | デフォルトのNGINX |
| WordPressを実行するPHPは何を使うか | デフォルトのPHP7 |
| Rubyのバージョン | デフォルトのRuby2.4 |
| MySQLサーバーは | デフォルトのMariaDB |
kusanagiのパスワードはWordPressのアップデート時に利用されます。
kusanagi.pem.pubが何故か/root/kusanagi.pem.pubに生成されないので、もしkusanagiアカウントでssh接続したければ、別途 rsa公開鍵・秘密鍵を作成する必要があります(作らなくても特に問題ありません)。
ConoHa VPSでssh接続を行う時の注意点
番外編 コマンドだけで初期設定
kusanagi init --tz tokyo --lang ja --keyboard ja --passwd [任意のパスワード] --nophrase --nginx --php7 --dbrootpass [任意のDB用パスワード]
WordPressサイトを立ち上げる(プロビジョニング)
KUSANGIの初期設定が終ったのでいよいよWordPressサイトを立ち上げます。
applingo.tokyoドメインを例に紹介します。
まずプロファイル名を決めます。applingo.tokyoなのでプロファイル名はapplingoにします。
プロファイル名は何でもいいですが、あとから見たときにどのサイトのものかがわかりやすい名前にするのが良いです。
kusanagi provision 【プロファイル名】で作成します。
Target directory is /home/kusanagi/applingo.
Choose the installation language of WordPress.
1 : en_US
2 : ja
q : quit
Which do you choose?: 2
You choose: ja
Enter hostname(fqdn) for your website. ex) kusanagi.tokyo
applingo.tokyo
Re-type hostname(fqdn) for your website.
applingo.tokyo
In order to use Let's Encrypt services, you must agree to Let's Encrypt's Term of Services.
If you agree to this TOS, type your email address; if not, hit enter twice.
TOS of Let's Encrypt : https://letsencrypt.org/repository/
【E-mailアドレスを入力します】
Re-type mail address.
【再度確認のためにE-mailアドレスを入力します】
Enter the name of your database.
applingoDB
Re-type database name you create.
applingoDB
Enter user name for database applingoDB.
applingoUser
Re-type user name for database applingoDB
applingoUser
Enter password for database user 'applingoUser'. USE [a-zA-Z0-9.!#%+_-] 8 characters minimum.
Re-type password for database user 'applingoUser'.
--2019-04-20 17:44:11-- https://ja.wordpress.org/latest-ja.tar.gz
Resolving ja.wordpress.org (ja.wordpress.org)... 198.143.164.252
Connecting to ja.wordpress.org (ja.wordpress.org)|198.143.164.252|:443... connected.
HTTP request sent, awaiting response... 200 OK
Length: 11257079 (11M) [application/octet-stream]
Saving to: ‘wordpress.tar.gz’
100%[========================================================================================================================>] 11,257,079 5.82MB/s in 1.8s
2019-04-20 17:44:13 (5.82 MB/s) - ‘wordpress.tar.gz’ saved [11257079/11257079]
Saving debug log to /var/log/letsencrypt/letsencrypt.log
Plugins selected: Authenticator webroot, Installer None
Obtaining a new certificate
Performing the following challenges:
http-01 challenge for applingo.tokyo
Using the webroot path /home/kusanagi/applingo/DocumentRoot for all unmatched domains.
Waiting for verification...
通信をのぞき見されることがないようにサイトをhttps化します。
https化する
KUSANAGIではhttps化がめちゃくちゃ簡単です。
kusanagi ssl --https redirect 【プロファイル名】
https://【あなたのドメイン】にアクセスしてみます。その際に、wordpressのユーザー名とパスワードを設定するので、送信内容が暗号化されるhttpsであれば、通信中に中身を見られることがないので安心です。
一つのConoHa VPS インスタンスに複数のドメインを共存させる
KUSANAGIでは異なるドメインで複数のサイトを管理するのは簡単です。
単純に新しいプロファイルを作成するだけです。
kusanagi provision 【新しいプロファイル名】
前述した対話形式のプロビジョニング設定を行うだけで、別のドメインのWordPressサイトを立ち上げることができます。
NGINXの設定などはKUSANAGIが自動で行います。
/home/kusanagi以下に[新しいプロファイル名]のディレクトリが作成されます。
ですので、特に設定を気にすることなく、ガンガン新しいサイトを立ち上げていくことができます。
立ち上げたWordPressサイトの最低限のセキュリティ設定を行う
KUSANAGIはWordPressのセキュリティについてガイドラインを示してくれるのでそれに従いましょう。
/home/kusanagi/[プロファイル名]内で、
chmod 440 wp-config.php
chown kusanagi.www wp-config.php
mv wp-config.php ../
chmod 755 wp-content/
設定を間違えたりして、プロファイルを削除したいとき
設定を間違えたりして最初からサイト設定を作成し直したい時には、kusanagi remove -y [プロファイル名]を使います。
プロファイル名はWordPressサイトにつけた別名です。/home/kusanagi/[プロファイル名]にそのサイトのワードプレスがインストールされています。


コメント